Nutrient burn is one of the most common mistakes made by novice marijuana growers. It typically occurs when the plants receive too much fertilizer. As the nutrient levels at the roots increase, the tips of the multi-fingered leaves will begin turning yellow or brown. Soon after, the burnt tips will also start drying and curling inwards. If left unaddressed, the plants may shrivel up or even die.
Given how damaging nutrient burn can be, it’s important to address it immediately. And to do so, you’ll need to understand why and how nutrient burn occurs in cannabis plants, as well as how to diagnose it. This detailed guide provides everything you need to know about how to fix nutrient burn and how to prevent it.
Page Content
What Is Nutrient Burn?
Nutrient burn is also called fertilizer burn, root burn, or simply nute burn. It’s what happens when marijuana plants are fed with too much fertilizer – especially chemical- or mineral-based ones.
Unlike organic options, chemical and synthetic fertilizers don’t release the nutrients slowly over time and don’t need to be worked into the medium. Instead, they’re readily available and facilitate rapid nutrient uptake for fast-acting results. The drawback is that it makes it easy for the plants to take in more nutrients than they actually need.
Put another way, nutrient burn typically arises when you overfeed or give the plants an unhealthy dose of nutrients. And when the surplus nutrients accumulate in the root zone, the water flow through the plant is impeded. This triggers the scorched leaf tips and dried spots or markings, as well as other symptoms that may affect the whole plant. Even worse, without immediate treatment, the plants could dry out and die.
If, by some miracle, the plants managed to pull through, don’t celebrate just yet. You’ll most likely end up with a subpar harvest at best. The loss of foliage, for one, will significantly slow down growth and reduce your overall yields. On top of that, the excess nutrients left behind will impart a nasty chemical-like taste to your buds. In other words, cultivating and harvesting these ailing plants will just be a waste of precious time and resources.
Possible Causes of Nutrient Burn
While overfeeding is the usual culprit behind nute burn, it’s actually not the only one. Here are some of the most common causes of nutrient burn in marijuana plants.
- Not knowing how to properly make a nutrient solution and mixing the nutrients stronger than what is recommended.
- Drying out the soil too much, which causes the existing nutrient concentration to spike up.
- Overwatering, which prevents the roots from accessing oxygen.
- Overusing growth stimulators or bloom boosters.
A Note on Cannabis Nutrient Requirements
Like any other plant, cannabis needs nutrients to grow, thrive, and bloom. But the thing is, any nutrients won’t do. It’s a delicate balancing act and you’ll need to provide the appropriate blend of macronutrients and micronutrients for every growth phase.
Marijuana plants require nitrogen (N), phosphorus (P), and potassium (K) – the three primary macronutrients – in large quantities. The proportion and demand for these nutrients – otherwise known as the NPK ratio – depend on the current stage of growth. Vegetating plants typically need a higher amount of nitrogen and potassium. After switching to the flowering phase, you can lower the amounts of nitrogen and raise the phosphorus levels to encourage budding.
Aside from these three major elements, the plants will also need some secondary macronutrients, such as calcium, magnesium, and sulfur. Plus, they require a long list of micronutrients, although in much lower concentrations than that of the macronutrients.
It may sound complicated, but the takeaway is simple. If the plants receive too much of any of the required nutrients, they can get nutrient burn.
How to Spot Nutrient Burn
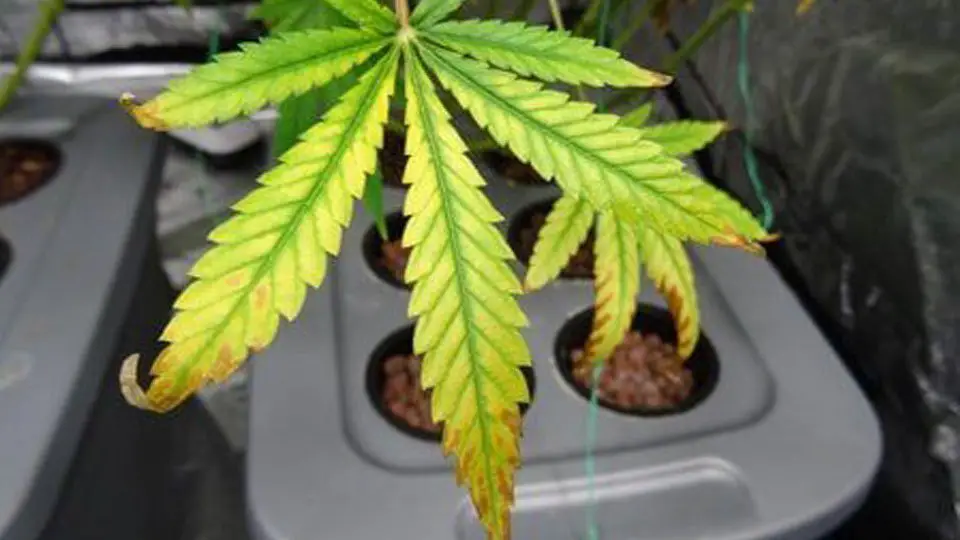
Nutrient burn manifests itself physically in plenty of ways. As mentioned, it usually affects the tips of marijuana leaves. Due to the disrupted water transport across the plant, the tips will begin turning yellow, tan, or brown.
Fortunately, there are much earlier indications of fertilization burn, some of which are not limited to the leaves.
Here are the early tell-tale signs of nutrient burn:
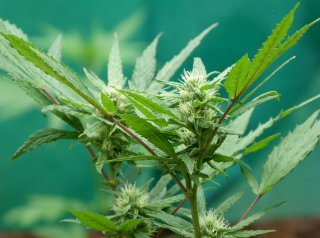
- The foliage of your cannabis plants will take on a deep green shade.
- The tips of the leaves will become bright and nearly translucent.
- The leaf tips may begin bending to a 90-degree angle.
- The sugar leaves and calyxes will start yellowing.
- The plant stalks and branches may turn deep red, magenta, or even purple.
After some time, the yellowing tips will likely sport a rusty brown shade. Depending on how severe the problem is, you might see the “burnt” appearance just on a couple of blades or the entire leafage. But don’t worry. By this point, the plants can still be salvaged.
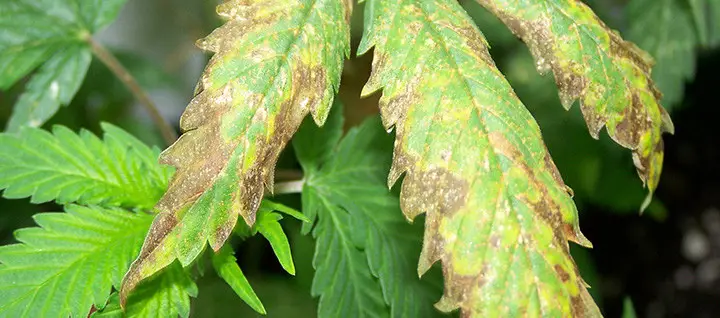
As nutrient burn progresses, the brown or bronze tips will spread inwards and affect the rest of the leaves. The yellowing may intensify, for one. Plus, the leaves will also become crispy, curled, and twisted. Take action immediately. If the damage increases any further, the plants may already be goners. This is why it’s critical to treat cannabis plants in the earlier stages of nutrient burn.
At the advanced stage of nutrient burn, you’ll notice the following symptoms:
- The foliage will have turned yellow and burnt-looking.
- The leaves will curl downwards and quickly die off.
- The buds will turn yellow or brown.
Be aware that even if you manage to nurse the plants back to health, the burnt-looking leaves won’t disappear. Rest assured, though, that the newer leaves won’t have brown tips anymore.
How to Fix Nutrient Burn
If left unmanaged, nutrient burn can result in the loss of your crops. Fortunately, if you know how to detect the early warning signs of nute burn, you’ll be able to address the problem before it exacerbates. Here’s a detailed step-by-step guide on how to do it.
Step 1: Remove the Affected Plant Parts
Once you’ve diagnosed nutrient burn, the first step is to prune off all the damaged parts, including the leaves and the calyxes. Unfortunately, they’re already beyond cure. If left attached, they will only die off and begin rotting, leaving you with more problems to deal with. As for the calyxes, you’ll want to trace each cluster back to its branch. Remove the whole floret, for good measure.
Step 2: Flush the System
After snipping off the sickly parts, it’s time to flush the system. This is done to get rid of the excess nutrients and minerals in the growing medium, enabling you to start on a blank slate. At the same time, it also helps your plants recuperate faster.
Flushing is fairly straightforward. It’s just a matter of saturating the pots completely with pH-balanced water. Flood the container slowly, pausing as needed. Remember to discard the dirty runoff water at the bottom. Wait for about 15 minutes, then repeat the entire process. Ensure that the excess water can freely trickle out of the pots. By then, the runoff should appear lighter in color.
You can use a total dissolved solids (TDS) meter to check if the plants have been flushed properly. Measure the parts per million (ppm) – or the concentration of substances – of the drained-off water. Ideally, it should be about 50 ppm. If not, keep flushing until the ppm reading approaches the desired value.
Step 3: Evaluate Your Nutrient Routine
After flushing the growing medium, you can finally start afresh. Take this opportunity to assess your existing nutrient regime, as well as what your plants need. If you have a grow journal, then take it out and go over your plants’ feeding history. Of course, it also helps to be familiar with the nutrient requirements of cannabis plants across the different stages of growth. If you already know about it, then a little refresher won’t hurt.
You might want to check your substrate, too. Are you using good-quality soil? If not, explore other options.
Super soil, for instance, is a highly amended soil that already contains all the nutrients that cannabis plants need throughout the entire growing cycle. All you have to do is water the plants with pH-balanced water. Alternatively, you can also use compost to nourish the plants. Also called “black gold,” this organic material is packed with nutrients and helps promote nutrient availability. As a bonus, it dramatically improves the texture, structure, and overall quality of the soil as well.
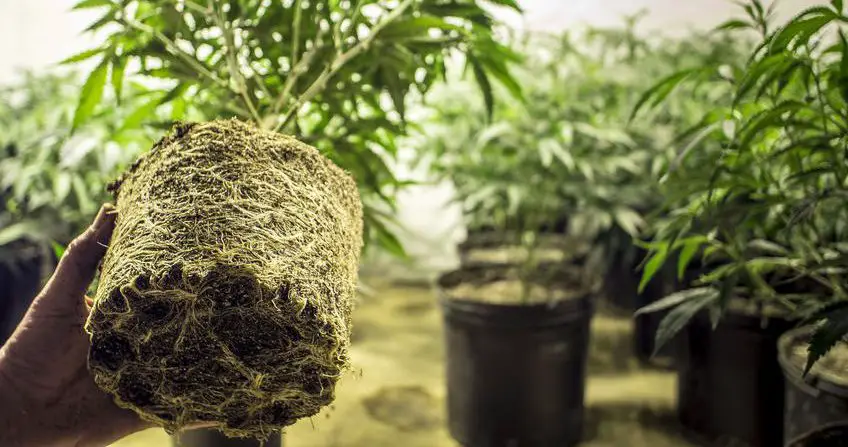
Step 4: Strengthen the Roots
Don’t get back to a regular feeding schedule just yet. You’ll want to make sure that your plants are in top form first. The roots, in particular, will need a bit of extra tender loving care. Opt for specialized plant tonics with silver nitrate, humic and fulvic, or vitamins and minerals. These supplements can restore the crops to good health in no time.
Step 5: Re-Introduce the Feeding Schedule
After bolstering the root zone, it’s time to get back to feeding your plants. You want to take things slowly to avoid shocking your plants and causing a relapse.
For best results, start with 1/2 the recommended strength of the nutrient solution. Try to increase the concentration after every 2 or 3 feeds until you reach about 3/4 of the suggested dose. There’s no need to go all the way. Make sure to monitor your plants between every feeding session for any unusual symptoms.
If your plants are still in the vegetative stage, then give them more time to heal before flipping the switch. On the other hand, if your plants experienced nutrient burn during the flowering phase, then there’s not much you can do to make up for the damage. Remember, during this time, the plants are already focused on budding. They won’t make any effort to bounce back from any leaf damage or to develop new ones.
Additional Tips on How to Fix Nutrient Burn
How you should treat fertilizer burn may vary slightly depending on your growing method. More specifically, you’ll have to change how you “flush” or restart the system.
For Soil-Based Container Grows
If you’re using a soil- or coco coir-based container grow, you can follow our guidelines above on how to flush out the nutrients and minerals from the medium. Remember to stay within the ideal pH levels. For soil, keep it between pH 6.0 to 6.8. On the other hand, for coco coir, the optimal pH range is 5.5 to 6.5.
For Outdoor Gardens
For outdoor marijuana plants that are grown directly into the ground, flushing, of course, is out of the question. You can provide the crops with more moisture than usual, but you’ll have to take extra care not to overwater and waterlog the soil. In this case, the best option is to stop feeding the plants and allow them to use up the surplus nutrients in the medium. If your plants are still in the vegetative phase, they should start growing healthy leaves within a week or so.
For Hydroponic Systems
If you’re growing marijuana hydroponically, there’s no need to flush the system. One option is to add plain, pH-balanced water to the reservoir to thin down the nutrient concentration. Alternatively, you can empty the tank and replace it with fresh, pH- and nutrient-balanced water. Ensure that the pH sits between the acceptable range of pH 5.5 to 6.5. Also, for the time being, you’ll want to reduce the overall levels of nutrients in the water reservoir. Dilute the nutrient mix and start with just 1/2 strength of what you would normally give them.
How to Prevent Nutrient Burn
Nutrient burn is an alarming problem that you’ll want to avoid at all costs. Lucky for you, there are several ways to keep fertilizer burn at bay. Here are some tips to help you get started.

Understand Plant Nutrition
If you still haven’t quite grasped the basics of cannabis nutrient requirements, then now is the time to sit down and try to learn it. Remember, marijuana plants demand a wide range of nutrients to grow and thrive. Not to mention, their specific needs also vary immensely as they grow, which means that you’ll have to tweak the nutrient regime accordingly.
Read the Label
If you’re using pre-made fertilizers, make sure to read the instructions and guidelines on the packaging before anything else. You don’t have to follow the recommended strength in the label, though. This is because fertilizer manufacturers often indicate the highest possible dose. So, to be safe, just work your way to about 3/4 of the suggested concentration. If your plants are extra-starved, it’s easy to add more nutes as you go along.
Take It Slowly
When feeding cannabis plants, always remember that less is more. As you’ve already seen, over-fertilizing won’t bring any benefits in terms of growth and yields. Furthermore, when introducing a new nutrient schedule, ease your plants into it to avoid unwanted stress.
Measure Your Nutes
When making the nutrient solution, make sure to use measuring tools, such as cups, spoons, or even syringes. This ensures that you’re adding the right amount of nutrients every single time – no more, no less.
Invest in a Quality EC Meter
An electrical conductivity (EC) meter is a device used to measure the total concentration of dissolved ionic salts in a solution. In other words, it lets you know how much nutrients are present in a liquid. The recommended EC values for marijuana plants (measured in mS/cm) depend on their current growth stage. In general, an EC of about 1.3 to 1.7 is ideal for vegging, while 1.2 to 2 is suitable for the flowering phase. Just keep in mind that the exact values may vary from strain to strain.
By checking the EC value before every feed, you can ensure that you’re not giving the plants more than what they need. If it’s too low, simply add more nutes until the EC reading falls within the optimal range. If it’s too high, on the other hand, it’s just a matter of diluting the blend with water.
Keep a Grow Journal
If you’re still not keeping a grow planner, then it might be high time you did. If it sounds too daunting, then try starting with a feeding journal. It helps you keep track of the feeding schedule, so you can ensure that the plants are always suitably-fed. Now that your plants’ feeding history is all written down on paper, it will be much easier for you to diagnose nutrient-related problems down the road. And as you probably already know, this can very well be the difference between life and death for your plants.
Fix and Avoid Nutrient Burn in a Few Simple Steps
Nutrients play a key role in vigorous growth and prolific budding. But when applied in excess, it won’t skyrocket growth, produce fatter buds, or boost overall yields. Far from it. Instead, nutrient burn is bound to happen. It first manifests itself as yellowing and browning on the leaf tips. Eventually, the symptoms will affect the rest of the leafage and the entire plant. By then, the plants are already unsalvageable.

Nutrient burn is all-too-common among novice and seasoned growers alike. For sure, it’s something that every marijuana cultivator has encountered – or will encounter – at one point. Fortunately, there are surefire ways to address it.
The first step is to diagnose the problem immediately. That entails knowing the early warning signs of nute burn. After confirming that your plants are indeed experiencing root burn, remove the damaged components, then flush the system so you could start on a blank slate. Assess the situation and come up with a new nutrient routine. Strengthen the roots and bring them back to prime health before re-introducing your plants to their revamped feeding schedule. As with most things, though, prevention is always better than cure. With the right feeding practices and careful monitoring, you should be able to avoid nutrient burn and secure a bountiful harvest.